Homemade Peanut Butter Cups Mini Bites
Highlighted under: Indulgent Oven Treats
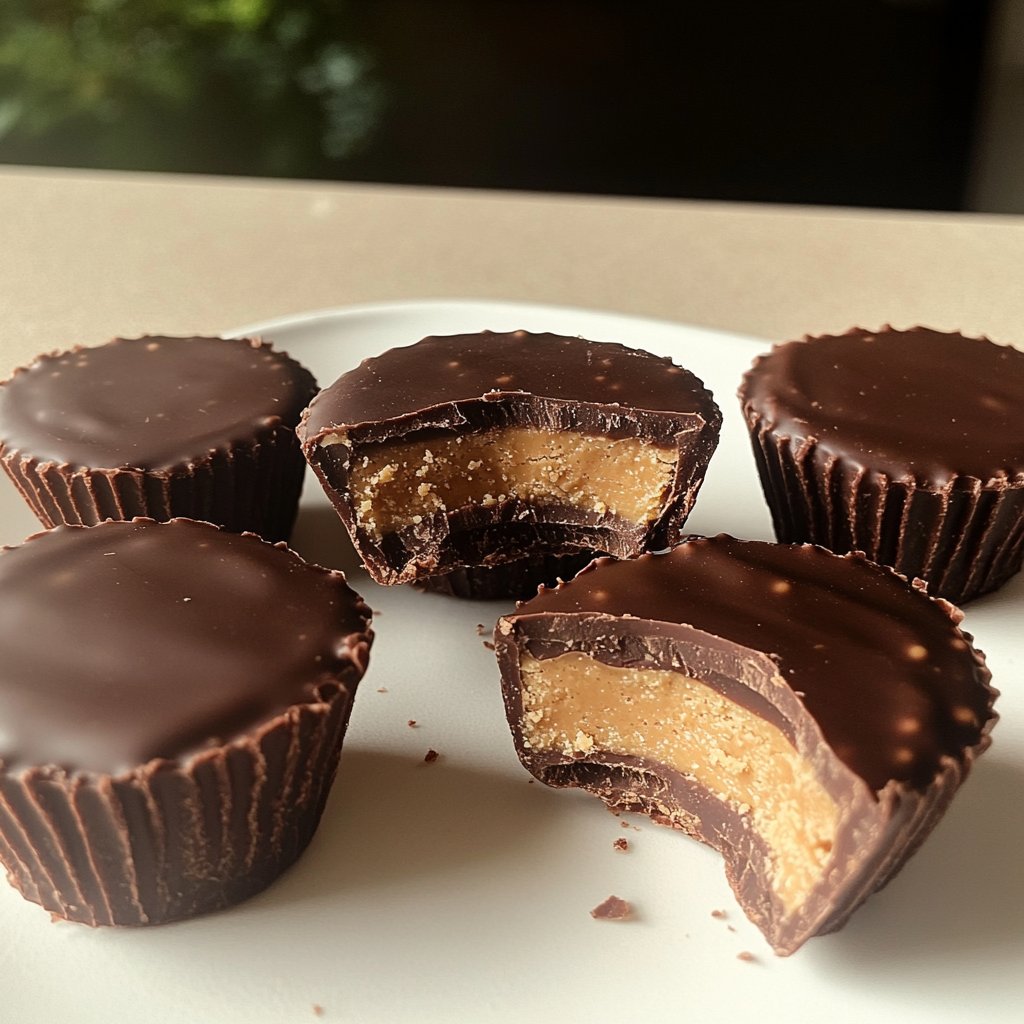
I absolutely love making these Homemade Peanut Butter Cups Mini Bites as a delightful treat in my kitchen. There's something incredibly satisfying about melting chocolate and mixing it with rich peanut butter. The combination of textures and flavors is irresistible, and the best part is that they are so simple to prepare. Whether for a quick snack or a special occasion, these mini bites never fail to impress, and I often find myself sharing them with friends and family who can’t get enough of these tasty bites.
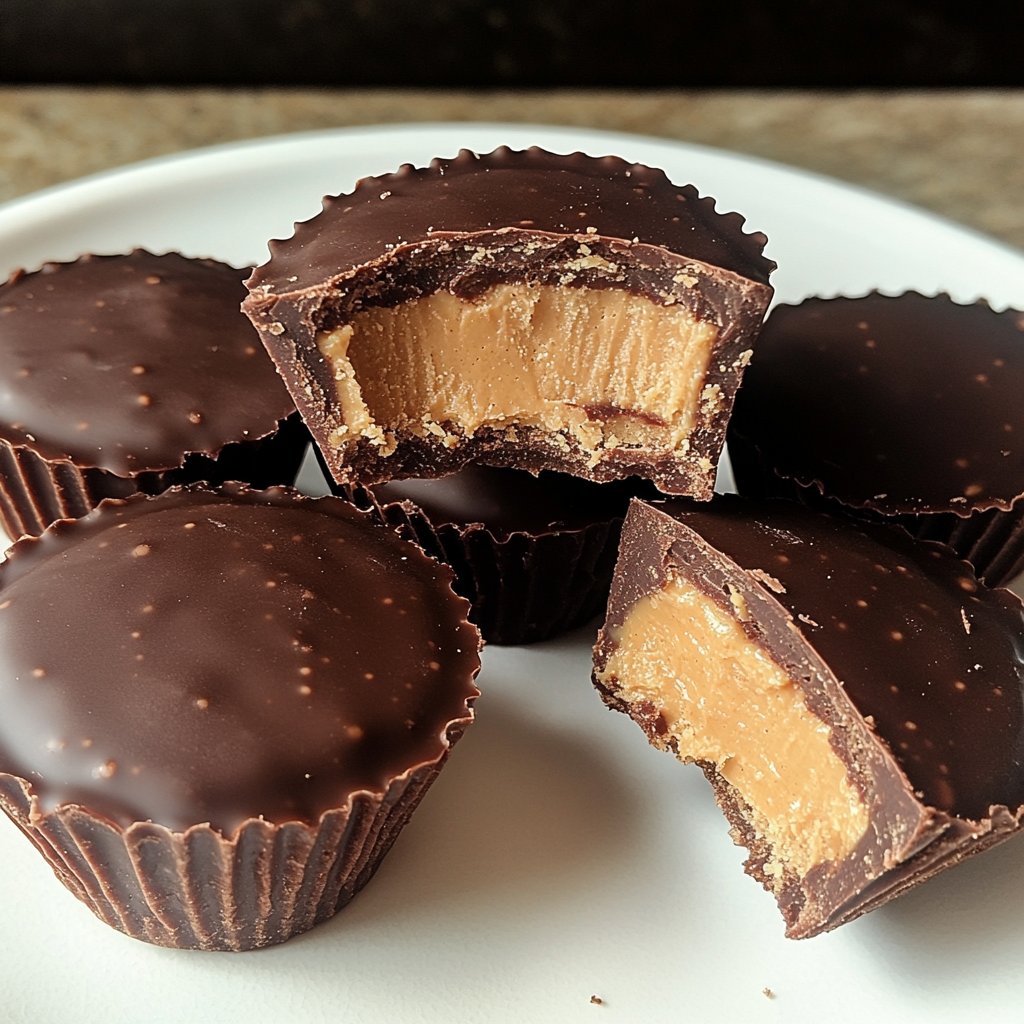
Creating these mini peanut butter cups has become a beloved tradition in my household. The first time I made them, I was amazed at how easily the creamy peanut butter filling came together, making them taste just like the classic store-bought version but better! I particularly enjoy using dark chocolate to balance the sweetness with a little bitterness, enhancing the overall flavor.
One crucial tip I’ve learned is to keep the chocolate warm while filling the cups, ensuring that they seal well and are easy to remove from the molds. It makes all the difference in getting that perfect bite every time!
You'll Love These Mini Bites Because:
- Rich peanut butter filling in every bite.
- Decadent chocolate coating that satisfies your sweet tooth.
- Perfect portion size for a guilt-free indulgence.
Perfecting the Chocolate Coating
Melting chocolate can be tricky, but it’s crucial for the success of your mini bites. To achieve a smooth, glossy finish, heat the dark chocolate chips slowly in 30-second intervals in the microwave. Stir vigorously after each interval until they are completely melted, avoiding overheating which can cause the chocolate to seize up. If you notice any graininess, a splash of vegetable oil can help restore its smooth texture.
The chocolate layer not only provides a delicious contrast to the creamy peanut butter but also acts as a barrier to keep the filling intact. Ensure that each chocolate layer is sufficiently thick; too thin may lead to cracks when biting into these treats. If you run low on chocolate, you can add a little coconut oil to stretch it further, giving your bites a shiny finish.
The Role of Peanut Butter in Texture
Choosing the right peanut butter is key to achieving the ideal texture for the filling. Creamy peanut butter works best, as it blends seamlessly with the powdered sugar and vanilla. If you prefer a more natural taste, look for peanut butter that contains only peanuts and salt. However, avoid chunky varieties, as they can disrupt the smoothness of your bites.
You can also experiment with nut butter alternatives, such as almond or cashew butter, for a unique twist on the classic flavor. Just remember that these substitutions might alter the final taste slightly, so choose an option that complements your recipe. Mixing in some crushed graham crackers adds a delightful crunch and reminiscent of a classic s’more.
Storage Tips for Long-lasting Treats
Once your mini bites are fully set and removed from the liners, it’s important to store them properly to maintain their freshness. Keep them in an airtight container in the refrigerator for up to two weeks. If you need to keep them longer, consider freezing them. Just layer parchment paper between the bites to prevent sticking, and store them in a freezer-safe bag. They can be frozen for up to three months.
Thaw the bites in the refrigerator when you're ready to enjoy them, which helps retain their texture. Avoid thawing them at room temperature, as this can lead to condensation and a soggy chocolate coating. If you’re pressed for time, a quick 15-minute thaw in the fridge should be sufficient for a creamy and delicious treat.
Ingredients
Ingredients
For the Peanut Butter Cups
- 1 cup dark chocolate chips
- 1/2 cup creamy peanut butter
- 1/4 cup powdered sugar
- 1/2 tsp vanilla extract
- 1/4 cup crushed graham crackers (optional)
Instructions
Instructions
Melt the Chocolate
In a microwave-safe bowl, melt the dark chocolate chips in 30-second intervals, stirring in between until smooth. Be careful not to overheat.
Prepare the Mold
Use a mini muffin tin and line it with mini cupcake liners. Spoon a small amount of melted chocolate into each liner, just enough to cover the bottom.
Mix the Filling
In a separate bowl, combine the creamy peanut butter, powdered sugar, vanilla extract, and crushed graham crackers (if using). Stir well until smooth and creamy.
Assemble the Bites
Add a spoonful of the peanut butter mixture on top of the chocolate in the muffin liners and then cover with more melted chocolate, ensuring the filling is fully sealed.
Chill and Set
Place the muffin tin in the refrigerator for about 15 minutes, or until the chocolate has completely hardened. Remove the mini bites from the liners once set.
Pro Tips
- For an extra twist, try adding a sprinkle of sea salt on top of the chocolate before chilling for a delicious sweet and salty contrast.
Serving Ideas
These mini peanut butter cups make for delightful after-school snacks or party favors. You can arrange them on a decorative platter, adding a sprinkle of sea salt on top for a gourmet touch. For a themed party, consider using colored liners to match your event's décor, adding an extra layer of fun to your presentation.
You can also enhance your mini bites by pairing them with a side of fresh fruit or drizzling some melted chocolate over them for a more indulgent look. Serving with light whipped cream can balance the rich flavors, making them perfect for gatherings or casual entertaining.
Common Troubleshooting
If you find that your chocolate layer didn't adhere well to the peanut butter filling, it’s likely because the first layer of chocolate was either too cold or not thick enough. Next time, ensure the chocolate is warm and slightly glossy, making it easier to bond. Applying the chocolate while it's still warm helps create that perfect seal.
Additionally, if your filling seems too runny, consider adding slightly more powdered sugar for structure. This will help the mixture firm up while maintaining its creamy peanut butter flavor. It’s all about finding that perfect balance to ensure your mini bites hold their shape and deliver a satisfying crunch and chew.
Questions About Recipes
→ Can I use milk chocolate instead of dark chocolate?
Yes, you can use milk chocolate, but it will change the flavor profile, making it sweeter.
→ How should I store these mini bites?
Store them in an airtight container in the refrigerator for up to two weeks.
→ Can I make these vegan?
Absolutely! Use vegan chocolate chips and a plant-based peanut butter to create a vegan-friendly version.
→ What can I use instead of graham crackers?
You can substitute crushed digestive biscuits or omit them altogether if preferred.
Homemade Peanut Butter Cups Mini Bites
Created by: Freya Cooper
Recipe Type: Indulgent Oven Treats
Skill Level: Easy
Final Quantity: 24 mini bites
What You'll Need
For the Peanut Butter Cups
- 1 cup dark chocolate chips
- 1/2 cup creamy peanut butter
- 1/4 cup powdered sugar
- 1/2 tsp vanilla extract
- 1/4 cup crushed graham crackers (optional)
How-To Steps
In a microwave-safe bowl, melt the dark chocolate chips in 30-second intervals, stirring in between until smooth. Be careful not to overheat.
Use a mini muffin tin and line it with mini cupcake liners. Spoon a small amount of melted chocolate into each liner, just enough to cover the bottom.
In a separate bowl, combine the creamy peanut butter, powdered sugar, vanilla extract, and crushed graham crackers (if using). Stir well until smooth and creamy.
Add a spoonful of the peanut butter mixture on top of the chocolate in the muffin liners and then cover with more melted chocolate, ensuring the filling is fully sealed.
Place the muffin tin in the refrigerator for about 15 minutes, or until the chocolate has completely hardened. Remove the mini bites from the liners once set.
Extra Tips
- For an extra twist, try adding a sprinkle of sea salt on top of the chocolate before chilling for a delicious sweet and salty contrast.
Nutritional Breakdown (Per Serving)
- Calories: 150 kcal
- Total Fat: 10g
- Saturated Fat: 4g
- Cholesterol: 0mg
- Sodium: 50mg
- Total Carbohydrates: 12g
- Dietary Fiber: 1g
- Sugars: 8g
- Protein: 3g